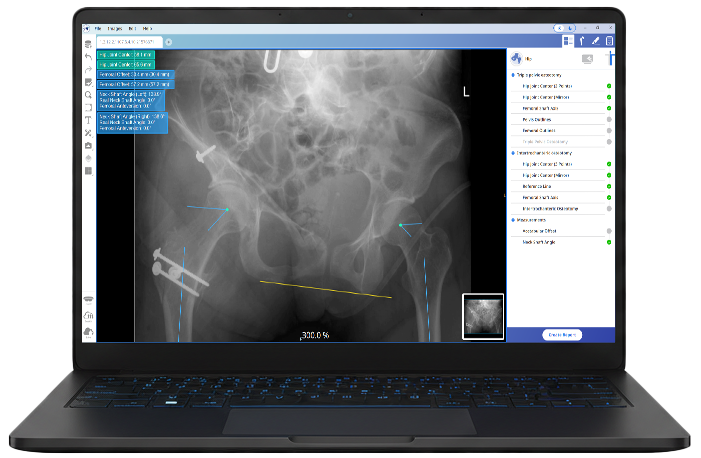


Numerous new functions in the mediCAD® 7.0 planning software enable even more digital templating and preoperative planning for orthopedics: Tibial Slope, implant sizing, partial knee planning with improved landmark detection and much more.

Intuitive surgical planning for anatomical shoulder, elbow, and hand/finger surgeries. Accurately measure and assess deformities and malpositions. Templating for implant sizing and Range of Motion Simulation.
An intuitive planning tool for femoral or tibial corrective osteotomy using the open-wedge or close-wedge technique. Automatically finds and corrects axial misalignments and simplifies selecting suitable osteosynthesis products with a template library and landmark detection.
Fast and efficient preoperative templating, automatic planning and manual planning for Intertrochanteric osteotomy, total hip arthroplasty, FAI, Biometry, Pediatric dimensions, Wear measurement, and Triple pelvic osteotomy. Fit suitable cup and stamp combinations, correct adductions and abductions and determine leg length compensation.
Bone segments can be isolated and shifted as well as landmark detection for required osteosynthesis products. Implant templates for plates, screws and nails are included.
Merges partial images in order to create a complete image, serving as an invaluable measurement tool.
Digital templating aids in manual and automatic planning for total knee prosthesis and knee arthroplasty. Determine and correct possible axial malpositions through templating, helping to extend the service life of knee replacement surgery.
Hallux valgus, ankle, flat foot and ankle instability.
Quick, easy and efficient radiological measurements, patient images and x-rays aid orthopedic surgeons for more intuitive surgical planning. The module automatically calculates angles and helps determines knee malpositions, measures hip joint morphology, and femoral and tibial torsion.
What are the system requirements?
Windows 10 (64 Bit) / Windows 11 (64 Bit)
Windows Server 2016 (64 Bit), Windows Server 2019 (64 Bit), Windows Server 2022 (64 Bit)
RAM ≥ 8 GB
2GHz CPU or more (64 Bit)
Hard disk drive ≥ 50 GB free storage
Where can I find the information (manual) for the individual modules?
The manual for mediCAD is digitally stored. Press the F1 key on your computer or click on the question mark in the menu bar of your mediCAD® program. There you can download the manual as PDF under “HELP”.
What do I do if the reference sphere scaling does not work automatically?
In the menu bar of your mediCAD® program, go to “FILE”, then to “SETTINGS” and then to “SCALING”. You can select the desired mode there and also specify the diameter of your reference sphere in mm.
How can I hide the individual manufacturers so that I don't constantly get the entire list of the prosthesis database?
Select the manufacturer you do not want and press the right mouse button. Then click on the sub-item “HIDE ELEMENT”, the manufacturer will then no longer appear. At the very bottom of the list of manufacturers you will find a small arrow symbol behind which these elements are hidden.
What do I do in my planning if I have several elements for prostheses (e.g. for revision sockets) and do not always want to leave the prosthesis database?
Click on the “+” button in the implant assistant. Now the option to add an element is automatically offered.
Where can I find gamma nails or PFNA nails, for example?
In your planning assistant, go to “OSTEOSYNTHESIS” or “PLATES / NAILS” in the lowest part. Implants are also located there.
At what point do I have to CUT OUT the FEMUR in the hip planning?
Draw a line across the femoral neck – regardless of your subsequent resection – and then determine a polygon around the femur. Finish drawing the polygon with a right click.
When do I have to correct ABDUCTION / ADDUCTION in the hip planning?
This is only an optional function if there is a congenital malposition or the X-ray is not optimal due to a less cooperative patient.
How do I bring the center of rotation of the cup and the center of rotation of the stem together?
First of all, this requires a femur section and the selection of only one neck length (center of the head). Under the menu item “REFIXING SHAFT / PROTHESIS”, first click on the cross of the neck of the shaft. Then the program catches the center of the prosthesis by moving the mouse towards it. CAUTION: Please always enlarge the image to avoid refixing incorrectly.
What is the difference between KNIEBASIS TIBIA NORMAL and KNIEBASIS TIBIA WITH FUJISAWA POINT in osteotomy?
With the function „KNIEBASIS TIBIA WITH FUJISAWA POINT“ you will get not only the tibial knee centre but also a second point, the Fujisawa-Point. This point is displayed as „X“.This point is laterally at 62% of the mediolateral tibial plateau and represents 3° overcorrection; the bearing line (miculic line) is later drawn through this point.
How do I draw my line in the OSTEOTOMY to get an OPEN WEDGE or a CLOSED WEDGE?
In the same way as you would execute the resection during surgery, you draw the line with 2 points. With the third point you define the rotation centre for OPEN or CLOSED WEDGE.